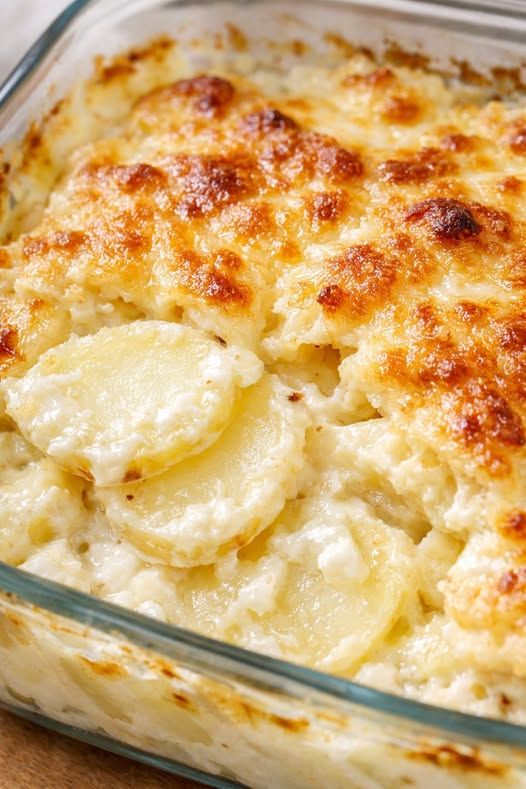
Cheesy Scalloped Potatoes
Step-by-Step Instructions
Step 1 — Preheat the Oven and Prepare the Dish
Position a rack in the middle of the oven and preheat to 375°F (190°C). Lightly grease a 9×13-inch glass or ceramic baking dish — a light coating of cream on the bottom or a quick swipe of neutral oil or butter helps with cleanup later and prevents the bottom layer of potatoes from sticking to the dish. A glass or ceramic baking dish is recommended over metal: glass and ceramic distribute heat gently and evenly, which is better for the slow, thorough cooking this recipe requires, and allows you to see through the sides of the dish to check the sauce level during baking.
Step 2 — Slice the Potatoes
Peel the potatoes and slice them as thinly and evenly as possible, aiming for 1/8-inch thickness throughout. Using a mandoline set to this thickness makes the job fast and produces perfectly consistent slices. If slicing by hand with a sharp knife, work slowly and try to keep a consistent cutting angle and pressure. As you slice, you can place the potato pieces in a bowl of cold water to prevent browning while you finish the rest — drain and pat completely dry with paper towels or a clean kitchen towel before layering, since excess surface water will dilute the cream sauce.
Step 3 — Season the Cream
In a measuring cup or medium bowl, combine the heavy cream and kosher salt. Stir for 30 to 60 seconds until the salt is fully dissolved into the cream. This simple step ensures the entire dish is evenly seasoned — the salted cream will penetrate every layer of potato as it seeps down through the dish during baking, seasoning the potatoes from the inside out as they cook.
Step 4 — Build the Layers
Arrange approximately one-third of the potato slices in an even layer across the bottom of the prepared baking dish, overlapping the slices slightly like shingles on a roof — this slight overlap prevents the cream from running straight through and helps the layers hold together once baked. Sprinkle approximately one-third of the shredded cheddar (about 1 cup) evenly over the potato layer. Repeat with the second third of the potatoes, overlapping them in the same way, and scatter another third of the cheese over that layer. Finish with the remaining potato slices arranged neatly on top. Reserve the final third of the cheese for the last stage of baking — adding it at the beginning would cause it to burn during the long covered bake.
Step 5 — Add the Cream
Slowly pour the salted heavy cream evenly over the assembled potato layers. Pour it in a steady stream across the entire surface of the dish rather than all in one spot, and tilt the dish gently in each direction if needed to encourage the cream to distribute evenly and run down between the layers. The cream should come nearly to the top of the uppermost potato layer but not completely submerge it — the top layer peeking above the cream will develop a slightly different texture than the submerged layers, which is part of the appeal of the finished dish.
Step 6 — Bake Covered
Cover the dish tightly with aluminum foil, pressing it down at the edges to seal in steam, and place on the middle oven rack. Bake covered for 45 to 50 minutes, until the potatoes are mostly tender when pierced through the foil with a thin knife or skewer, and the cream is beginning to bubble visibly around the edges of the dish. The covered bake stage steams the potatoes and allows the cream to begin reducing and thickening around them without the top drying out or the cheese burning before the potatoes are cooked through.
Step 7 — Add the Cheese Topping and Finish Baking
Carefully remove the foil — steam will escape, so lift the edge farthest from you first. Scatter the remaining shredded cheddar evenly across the top of the potato layers. Return the dish to the oven, uncovered, and bake for an additional 20 to 25 minutes until the top is deeply golden brown, the cheese is fully melted and beginning to bubble and brown in spots, and a knife inserted all the way to the center of the dish meets no resistance. For an extra-golden, slightly crispy top, switch the oven to broil for the final 1 to 3 minutes — but watch constantly, as the cheese can go from perfect to burnt very quickly under the broiler.
Step 8 — Rest Before Serving
Remove the dish from the oven and allow it to rest on a wire rack or folded kitchen towel for at least 10 to 15 minutes before serving. This resting time is important: the cream sauce continues to thicken as it cools slightly, and the layers firm up enough to hold together when scooped rather than collapsing into a liquid pool. Cutting or scooping too soon produces a runnier, messier result than the same dish allowed to rest properly. Use a large spoon or spatula to scoop generous portions into shallow bowls or onto plates.
Tips for Success
Slice as thinly and evenly as possible. Uniform 1/8-inch slices are the single most important technical element of this recipe. Slices that are too thick won’t cook through completely in the given time, leaving firm, undercooked potato in the center of the dish. Uneven slices mean some areas are overdone and mushy while others are still firm. A mandoline slicer is worth using here if you have one.
Dry the potato slices if you’ve soaked them. If you sliced the potatoes ahead and stored them in cold water (a good technique to prevent browning), make absolutely sure they are thoroughly dried before layering. Excess water on the surface of the potato slices dilutes the cream sauce and prevents the natural thickening that makes this dish work. Pat dry in batches with paper towels before assembling.
Don’t rush the resting time. Ten to fifteen minutes of resting after the dish comes out of the oven transforms the texture from loose and liquid to properly saucy and cohesive. The difference between scooping at 5 minutes and at 15 minutes is very noticeable. Use the time to finish the rest of your meal.
Shred the cheese fresh. Pre-shredded cheese from a bag contains anti-caking agents that interfere with clean melting. Block cheddar freshly grated on the large holes of a box grater melts smoothly, evenly, and produces a better sauce throughout the layers and a cleaner golden crust on top.
Season beyond the cream if needed. The 1½ teaspoons of kosher salt in the cream seasons the dish well, but taste preferences vary. After the dish has rested and you’ve plated a portion, taste and add a pinch of flaky sea salt or freshly ground black pepper to your serving if the flavor needs a lift. A small grind of black pepper over each layer during assembly — even though it pushes past the strict four-ingredient limit — adds welcome depth with almost no effort.
Make-Ahead and Storage
This dish is well-suited to making ahead, which makes it particularly valuable for holidays and gatherings when oven time is tight. To prepare in advance, assemble the dish completely through the cream-pouring step, cover tightly with foil, and refrigerate for up to 24 hours. Bake straight from the refrigerator, adding 10 to 15 minutes to the covered baking time to account for the cold start. The cheese topping is added and the dish finished uncovered exactly as directed.
Leftovers keep well in an airtight container in the refrigerator for up to 4 days. The dish thickens considerably as it chills — this is normal and expected. Reheat covered with foil in a 350°F oven until warmed through, about 20 minutes, or in the microwave in short bursts, stirring gently between intervals. Add a splash of cream if the reheated dish seems too thick or dry.
Frequently Asked Questions
Can I use a different cheese?
Yes, and this is one of the most enjoyable variations to explore. Gruyère produces a slightly nutty, more refined flavor that makes the dish feel more elegant and restaurant-quality. A combination of sharp cheddar and Gruyère (equal parts) is particularly good. Mozzarella adds stretch and a mild creaminess. Fontina melts beautifully and has a nutty, slightly sweet quality that works well with the cream. Whatever cheese you choose, make sure it’s a good melting variety — aged cheeses like Parmesan or dry manchego are better used as accents than as the sole cheese in this application.
Can I use half-and-half instead of heavy cream?
Half-and-half can be substituted and will produce a lighter, less rich result. The sauce will be thinner and less creamy than the heavy cream version, and it may be slightly more prone to separating during baking. If using half-and-half, watch the dish more closely during the uncovered baking stage and be aware that the finished consistency will be less luxurious. Whole milk produces an even thinner result and is not recommended as a straight substitute without additional thickening.
Can I add extra ingredients?
Absolutely — the four-ingredient base is a starting point, not a ceiling. Black pepper and garlic powder added to the cream are the most natural first additions and make a significant difference to the depth of flavor. Thinly sliced onion layered with the potatoes adds sweetness and aroma. A sprinkle of smoked paprika over each layer adds color and a subtle smokiness. Diced ham or crumbled cooked bacon scattered between the layers turns the dish into a more substantial one that could anchor a lighter meal on its own.
Can I make this in a smaller dish for fewer people?
Yes. Halve all the ingredients and use an 8×8-inch or 9×9-inch square baking dish. The baking times remain approximately the same, though check for tenderness a few minutes earlier than the recipe directs since a smaller, shallower dish may cook through slightly faster. The covered baking time is particularly important to maintain — reduce the cream quantity proportionally to ensure there’s still enough liquid to generate steam and begin thickening around the potato layers.
Why did my cream sauce break or look curdled?
Heavy cream is quite stable in the oven, but a few things can cause the sauce to look separated or curdled. The most common cause is using a cream with lower fat content (such as light cream or half-and-half) that doesn’t have the same heat stability as true heavy cream. Oven temperature that’s too high can also cause separation — make sure your oven is calibrated to 375°F and not running hotter. If the sauce looks separated when the dish comes out of the oven, stir gently with a spoon after it has rested — it often comes back together as it cools slightly.
Variations Worth Trying
Garlic cream version: Stir two minced garlic cloves or half a teaspoon of garlic powder into the salted cream before pouring it over the potatoes. The garlic infuses the cream as everything bakes together and adds a savory depth that complements the sharp cheddar particularly well. For an even more aromatic version, rub the inside of the baking dish with a cut clove of raw garlic before greasing it — the garlic oils transfer lightly to the bottom layer of potatoes.
Caramelized onion version: Cook two thinly sliced yellow onions in two tablespoons of butter over low heat for 30 to 40 minutes, stirring occasionally, until deeply golden and sweet. Layer the caramelized onions between the potato layers along with the cheese. The sweetness of the onions against the sharpness of the cheddar and the richness of the cream produces an exceptionally complex, deeply flavored result that’s well worth the extra time.
Smoked paprika and pepper version: Add a generous pinch of smoked paprika and a grind of black pepper to each potato and cheese layer as you build the dish. The paprika adds warmth and a subtle smokiness that enhances the cheddar’s flavor, and the black pepper cuts through the richness of the cream sauce. This is the simplest possible way to add more depth of flavor while keeping the recipe practically as minimal as the original.
Ham and cheddar version: Scatter a cup of diced cooked ham across the second layer of potatoes before adding the cheese. The salty, smoky character of the ham works in natural harmony with the sharp cheddar and rich cream, and the dish becomes substantial enough to serve as a main course alongside a simple green salad. This is a particularly good way to use leftover baked ham.
What to Serve Alongside
Cheesy scalloped potatoes are rich and filling, so they pair best with proteins and vegetables that provide contrast in both flavor and texture. Roast chicken is the most natural pairing — its savory, browned skin and juicy meat complement the creamy potatoes without competition. Baked or glazed ham is a classic combination, particularly for Easter and holiday meals. Pork chops, whether pan-seared or grilled, provide a slightly leaner counterpoint to the richness of the potatoes. On the vegetable side, steamed or roasted green beans, roasted broccoli, a simple green salad with a sharp vinaigrette, or pan-wilted spinach all provide fresh contrast to the dish’s creaminess. Avoid other starchy or creamy sides — this is a dish that works best as the single indulgent element on an otherwise straightforward plate.
Pure Comfort, No Shortcuts Needed
There are versions of scalloped potatoes that involve longer ingredient lists, more elaborate technique, and considerably more time at the stove. Those versions have their merits. But this four-ingredient version proves that when the ingredients are good and the method is right, simplicity is its own kind of excellence. Tender, cream-soaked potato layers, rich and sharp with melted cheddar throughout, topped with a golden, bubbly crust — it’s exactly what scalloped potatoes should be, and it requires almost nothing to achieve it. Make it once and you’ll understand why this is the dish people stop letting you arrive without.
Enjoy!